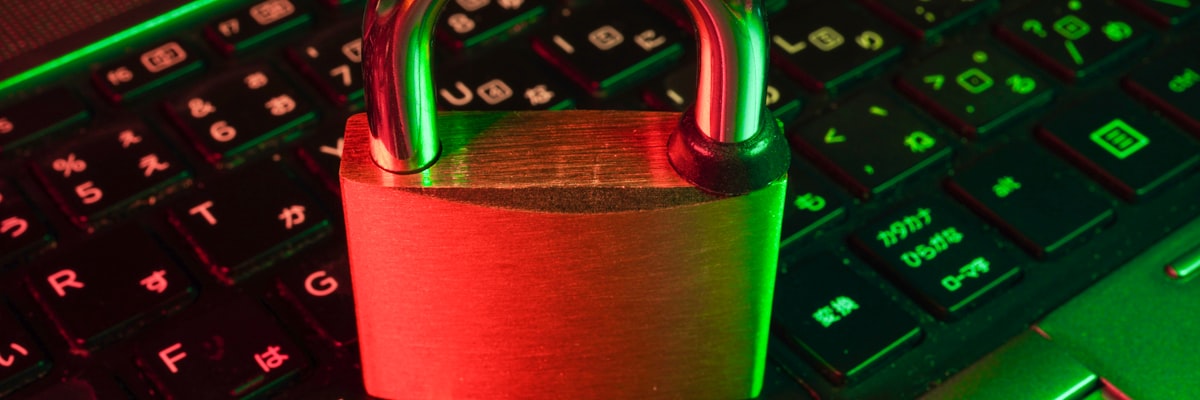
Safety First
Module 3: Passwords & Biometrics
What you will learn: How to keep your accounts secure without memorizing dozens of passwords. We will cover Face ID, password managers, and what those security terms actually mean in plain language.
Running a family digital literacy session? DCC Kids has age-appropriate versions of this topic.
Helen, 69, had one password for everything: her late husband's name followed by their anniversary year. She used it for her email, her bank, her iPad, Amazon, Facebook — everything. "It's easy to remember," she told her daughter.
Then one day, Helen noticed strange purchases on her Amazon account — three expensive Bluetooth speakers she had never ordered. Someone had figured out her password (it turns out her husband's name and their anniversary were both on her Facebook profile) and used it to get into her Amazon account. Because Helen used the same password everywhere, the thief also tried it on her email — and got in.
Helen spent two stressful weeks changing passwords, calling her bank, and locking down her accounts. But the experience taught her something she now shares with every friend: "One password for everything is like one key for your house, your car, and your safety deposit box. If someone copies that key, they get into everything."
Today, Helen uses Face ID and a password manager. She says managing her passwords is now easier than it was before — and far, far safer.
Security Terms in Plain Language
Before we go further, let us define some words you might hear. Think of this as your personal dictionary:
Password: A secret word or phrase that proves you are who you say you are. Like a key to a lock.
Biometrics: Using your body to prove your identity — your face, your fingerprint, or even your voice. "Bio" means life, and "metrics" means measurement. So biometrics means "measuring something about you."
Face ID: Apple's system that uses the front camera on your iPad or iPhone to recognise your face. It is like a security guard who knows what you look like and opens the door when they see you.
Touch ID: Apple's fingerprint reader, found on older iPads and iPhones. You press your finger on the Home button and it recognises your unique fingerprint.
Face Unlock / Fingerprint Unlock: Android's version of the same idea. Many Android phones and tablets can recognise your face or your fingerprint to unlock your device and confirm your identity.
Password Manager: A secure digital vault that remembers all your passwords for you. You only need to remember one master password — the vault remembers the rest.
Two-Factor Authentication (also called 2FA or "two-step verification"): An extra security step when you log in. After typing your password, you also need a second proof — usually a code sent to your phone. It is like a door that needs both a key and a secret knock.
Apple ID: Your personal account with Apple. It is the email address and password you use to download apps, use iCloud, and access Apple services. Think of it as your membership card for everything Apple.
Google Account: Your personal account with Google. It is the email address (usually Gmail) and password you use to download apps from the Play Store, back up your data, and access Google services. Think of it as your membership card for everything on your Android device.
Confidence Check: Those terms are not so scary when they are explained properly, are they? You are building your tech vocabulary.
If reading those terms made your head spin a little — that is perfectly normal. Passwords and security terms were invented by engineers for other engineers. They were never designed to be easy for regular people to understand or remember. The confusion you feel is a flaw in the system, not in you. We are about to make the whole thing much simpler.
Biometrics: Your Face or Fingerprint Is Your Password
Modern devices can recognise you by your face or fingerprint. This is one of the most convenient and secure ways to protect your device.
Face ID on iPad and iPhone
If your iPad or iPhone is a newer model, it likely has Face ID.
How Face ID works: When you set up Face ID, your device takes a detailed map of your face using special sensors. It does not take a regular photograph — it creates a mathematical model of the shape of your face. This model is stored only on your device (it is never sent to Apple or anyone else). When you pick up your device and look at the screen, it checks: "Is this the same face?" If yes, it unlocks.
Setting Up Face ID
Face ID Setup
The Face ID setup in iPhone Settings guides you through a simple face scan — look at your phone and slowly move your head in a circle once. It takes about 30 seconds total.
Face ID works with glasses on or off, and it adapts as your appearance changes gradually over time. It does not work with a face covering, so you may need your passcode when wearing a mask. Face ID will also not let someone unlock your device while you are sleeping — your eyes need to be open and looking at the screen.
Fingerprint and Face Unlock on Android
Most Android phones and tablets come with a fingerprint reader, and many newer models also offer face unlock. The fingerprint reader is usually found on the back of the device, on the side (built into the power button), or under the screen itself. Setting it up is straightforward and takes just a couple of minutes.
Setting Up Fingerprint Unlock on Android
Setting Up Face Unlock on Android
Fingerprint Setup
The fingerprint setup in Android Settings asks you to repeatedly press and lift your finger on the sensor until it has learned every edge of your fingerprint.
Android fingerprint unlock is very reliable and works even if your hands are slightly damp. Face unlock on Android is convenient, but on most devices it is slightly less secure than fingerprint — some models can be unlocked with a good photograph. For best security, use fingerprint as your primary method and face unlock as a backup. You can have both set up at the same time.
Windows Hello: PIN, Face, and Fingerprint on Windows
Windows computers have a built-in sign-in system called Windows Hello. It lets you sign in with a PIN, your face (on computers with the right camera), or a fingerprint (on computers with a fingerprint reader). A Windows Hello PIN is especially useful — it is different from your Microsoft account password, and it only works on that specific computer.
Setting Up a Windows Hello PIN
Your Windows Hello PIN is tied to your specific computer — it cannot be used anywhere else. This means even if someone finds your PIN written down, they cannot use it to access your account from another device. It is safe to write your PIN on paper and store it securely.
You already know the most important security terms. That knowledge is your foundation.
Most people never learn what these words actually mean — you are already ahead.
Creating Strong Passwords
For accounts where you still need a typed password, here is how to make a good one:
123456, password, your name, your pet's name, your birthday, your anniversary, your address, "qwerty," or any single word found in the dictionary.
Using the same password for multiple accounts is like using the same key for your house, your car, and your safety deposit box. If a thief copies that one key, they get into everything.
A strong password is like a strong lock — it has multiple parts that work together. The best way to create one is the passphrase method:
Instead of a single word, use a short phrase of random words. For example:
Purple-Teacup-Bridge-44
This is much harder for a computer to guess than "MyName1954" but much easier for you to remember. You can picture a purple teacup sitting on a bridge with the number 44 on it. The sillier the image, the easier it is to remember.
More examples: Garden-Rabbit-Snow-17 or Kitchen-River-Maple-82
Passphrase
A passphrase like Purple-Teacup-Bridge-44 is easy to remember (picture a purple teacup on a bridge) yet extremely difficult for any computer to guess.
The key rules for passwords:
- Never use the same password twice. Each account should have its own unique password.
- Never share your passwords with anyone — not even someone who says they are from Apple or your bank.
- Make them long. A 16-character passphrase is far stronger than an 8-character password with random symbols.
Confidence Check: You do not need to be a computer expert to have strong passwords. A silly phrase you can picture in your mind is all you need.
Write your master password on paper and keep it in a locked drawer or a safe — never on a sticky note attached to your device. A paper backup in a secure location is perfectly fine.
Password Managers: Your Digital Vault
"But how am I supposed to remember a different password for every account?" Great question. The answer is: you are not. A password manager does it for you.
Your iPad comes with a built-in password manager called iCloud Keychain. Here is what it does:
- When you create a new account on a website, your iPad offers to save the password for you.
- When you return to that website, your iPad fills in the password automatically — you do not need to type it.
- It can suggest strong passwords when you are creating a new account.
- It warns you if one of your saved passwords has been found in a data breach.
- All of this is protected by your Face ID or passcode — no one else can see your passwords.
Making Sure iCloud Keychain Is Turned On
Password Manager App
A password manager stores all your passwords securely in one place. You only need to remember one master password — it fills in all the others for you automatically.
Viewing Your Saved Passwords
Your Android device comes with a built-in password manager called Google Password Manager. It works through your Google account and your Chrome browser. Here is what it does:
- When you create a new account on a website in Chrome, your device offers to save the password for you.
- When you return to that website, your device fills in the password automatically — you do not need to type it.
- It can suggest strong passwords when you are creating a new account.
- It warns you if one of your saved passwords has been found in a data breach (called a "Password Checkup").
- All of this is protected by your screen lock (fingerprint, face unlock, or PIN) — no one else can see your passwords.
Making Sure Google Password Manager Is Turned On
Viewing Your Saved Passwords
You can also visit passwords.google.com in any web browser to see all your saved passwords. You will need to sign in with your Google account. This is handy if you want to review your passwords on a computer as well.
Your Windows computer comes with a built-in password manager inside Microsoft Edge (your web browser). It works very similarly to the iPad and Android versions. Here is what it does:
- When you create a new account on a website, Edge offers to save the password for you.
- When you return to that website, Edge fills in the password automatically — you do not need to type it.
- It can suggest strong passwords when you are creating a new account.
- It monitors for data breaches and alerts you if any of your saved passwords have been compromised.
- All of this is protected by your Windows Hello PIN or computer password.
Turning On Password Saving in Microsoft Edge
Viewing Your Saved Passwords in Edge
If you prefer to use Google Chrome on your Windows computer, Chrome has its own built-in password manager that works identically. You can also visit passwords.google.com in any browser to see your Google-saved passwords. Both systems work beautifully — use whichever browser you are comfortable with.
You now understand password managers — the single most powerful tool for keeping your accounts safe.
You do not need to memorise dozens of passwords. The vault does it for you.
What About Third-Party Password Managers?
Your device's built-in password manager (iCloud Keychain, Google Password Manager, or Microsoft Edge) is free, already set up, and works perfectly for most people. However, some people prefer a separate app — especially if they use multiple types of devices (for example, an iPhone and a Windows computer).
Here are the three most trusted options if you decide you want one:
| App | Cost | Best For | Ease of Use |
|---|---|---|---|
| Bitwarden | Free (paid: $10/yr) | Best free option — open source, widely trusted | Moderate |
| 1Password | ~$36/yr | Easiest to use, excellent for families, works on all devices | Very easy |
| LastPass | Free (limited) / $36/yr | Long-standing service; had a security incident in 2022 — acceptable if you change your master password | Easy |
For most seniors: use your built-in password manager. It is free, already there, and works beautifully. If a family member suggests a third-party app and offers to help you set it up, Bitwarden (free) or 1Password (paid, easiest) are excellent choices. You do not need to rush into this — start with what is already on your device.
How to Set Up a Third-Party Password Manager
If you decide to try a third-party password manager, here is how to get started with 1Password — the easiest option for beginners. There is a 14-day free trial so you can try it before you pay a cent.
- Download the app. On your iPhone or iPad, open the App Store and search for "1Password." Download the app — it is free to install for the trial. On Android, find it in the Google Play Store.
- Create your account. Open 1Password and tap "Create Account." Enter your email address. You will receive a confirmation email — open it and tap the link to confirm.
- Create your Master Password. Choose ONE strong password you will remember. Three or four random words strung together work well: "Sunset-Garden-Bicycle-Maple" — long and easy to picture, but very hard to guess.
- Write your Master Password on paper. Write it clearly and keep it in a safe place at home — a drawer, a lockbox, or with your important documents. This is the one time paper is better than digital.
- Add your first password. Open a website you use often. When you see the login page, 1Password will offer to save your username and password. Tap "Save Login." Done!
- Next time you log in. When you return to that website, 1Password will offer to fill in your username and password automatically. Just tap "Fill" — no typing needed.
- Let it create new passwords. Next time you sign up for a new account, tap "Generate Password" in 1Password. It creates a strong random password and saves it. You never need to see or remember it.
Your Master Password is the key that unlocks every other password. Never save it digitally — not in a text file, not in an email draft, not in Notes on your phone. Write it on paper, store it at home, and do not share it with anyone except a trusted family member kept for emergencies.
If you forget your Master Password, 1Password cannot recover it — that is what makes it secure. The paper backup is your lifeline. Keep it safe.
Two-Factor Authentication: The Double Lock
Imagine your front door had two locks — a regular lock and a deadbolt. Even if someone copied your key, they still could not get in without also having the deadbolt key. That is what two-factor authentication does for your online accounts.
When you turn on two-factor authentication (let us call it "the double lock"), logging in works like this:
- You type your password as usual (the first lock).
- The website sends a short code (usually 6 numbers) to your phone or iPad (the second lock).
- You type that code into the website.
- Now the website knows it is really you — because even if someone stole your password, they would also need your phone to get the code.
Your Apple ID already uses two-factor authentication by default. When you sign in on a new device, Apple sends a code to your other devices. This is normal and it is protecting you.
Two-Factor Verification Code
A two-factor code arrives as a text message with a 6-digit number that expires in about 30 seconds. Enter it right after typing your password to complete the login.
The 3-Second Rule for Codes
The Four Types of Two-Factor Authentication
There are a few different ways to set up your "second lock." Here they are from easiest to most advanced — you only need to pick one:
1. Text Message Code (SMS) — Easiest for Beginners
When you log in, the website sends a 6-digit code to your phone as a text message. You type the code to complete the login. Takes about 10 extra seconds. No special app required — just your mobile phone number.
Best for beginners2. Email Code
Similar to SMS, but the code is sent to your email address instead of your phone. Good backup option if you prefer not to give out your phone number.
3. Authenticator App — More Advanced
Apps like Google Authenticator or Microsoft Authenticator generate codes every 30 seconds — even without internet connection. More secure than SMS because codes are not sent over the phone network. Requires one-time setup per account.
Best for maximum security4. Face ID or Fingerprint + Password
Using your face or fingerprint combined with your password. If you already use Face ID on your iPhone, you are doing this for your Apple account — Apple enables it by default.
Already on your iPhone or iPad- Banking — Most Canadian banks already require it. You may be using it without realising.
- Email (Gmail, Outlook) — Very important. Your email can be used to reset all your other passwords.
- Government services — CRA My Account, Service Canada.
- Facebook & Instagram — Optional but recommended.
- Amazon — Optional; especially important if you have a saved credit card.
Start with your email and your bank. These two accounts are the most important to protect, and once they are secured, the rest follows naturally.
Turn On the Double Lock for Your Gmail Account
Gmail (Google's email service) is used by millions of Canadians. Here is how to turn on two-factor authentication so your email is protected even if someone guesses your password.
📱 On iPhone or iPad (in the Gmail app or Safari)
- Open the Gmail app (red and white envelope icon) and make sure you are signed in.
- Tap your profile photo (your initial or photo, top right corner).
- Tap Manage your Google Account.
- Tap the Security tab at the top.
- Scroll down to How you sign in to Google.
- Tap 2-Step Verification.
- Tap Get started and follow the steps. Google will ask you to enter your phone number so it can send you a code by text message.
- Enter the code Google sends you to confirm it works, then tap Turn on.
The next time you sign in to Gmail on a new device or after logging out, Google will send a 6-digit code to your phone. Just type in the code and you are in. On your own phone or iPad, you usually stay signed in and will not be asked for a code every time.
🤖 On Android
- Open the Gmail app and tap your profile photo (top right).
- Tap Manage your Google Account.
- Tap the Security tab.
- Tap 2-Step Verification under "How you sign in to Google."
- Tap Get started. Enter your password if asked.
- Choose Text message as your verification method and enter your phone number.
- Enter the code Google sends you, then tap Turn on.
💻 On Windows, Mac, or Chromebook
- Open your browser and go to myaccount.google.com.
- Click Security in the left menu.
- Under "How you sign in to Google," click 2-Step Verification.
- Click Get started and sign in if asked.
- Follow the prompts to add your phone number.
- Enter the test code Google sends to confirm it works.
- Click Turn on.
Never give your 2FA code to anyone. A legitimate company will never call you and ask for your 6-digit code. If someone calls asking for your code — whether they say they are from Google, your bank, or the government — hang up immediately. That code is the key to your account, and giving it away hands them complete access.
Answering Your Questions About the Double Lock
What if I lose my phone?
When you set up 2FA, most services show you a set of backup codes — a list of one-time emergency codes. Print these or write them on paper and store them with your important documents. If you lose your phone, use a backup code to get in, then update your settings.
You can also contact the company's customer support line. They have a process for verifying your identity and restoring access — it may take a day or two, but it works.
Will I need a code every single time I log in?
No! Most services remember your own device for 30 days or longer. Once you log in successfully on your home computer or phone, you will not be asked for a code again for weeks. You mainly get a code when you log in on a new device or after a long time away from the site.
Is it really worth the extra step?
Yes — absolutely. Two-factor authentication stops over 99% of automated account hacking attempts. That 10 extra seconds once a month is a small price for knowing your bank account, email, and photos are protected. Security professionals use 2FA on every important account they own.
Do I have to use it?
Most websites make it optional — but some banks and government sites are starting to require it. Even where it is optional, enabling it for your bank and email is strongly recommended. Think of it like wearing a seatbelt: not every drive ends in an accident, but it is the right habit that protects you when it matters.
A Real Example: Logging In to Your Bank with the Double Lock
Online Banking Login — Step by Step
- Visit your bank's website (type the address yourself — never click a link in an email)
- Enter your username and password as usual (the first lock)
- The bank sends a 6-digit code to your phone by text message
- Open your text messages — the code arrives within seconds
- Type the 6-digit code into the bank website
- Tick "Remember this device for 30 days" if the option appears
- You are in — and your account is protected!
That is the double lock in action — simple, fast, and enormously effective.
Confidence Check: You now understand the three layers of security: a strong password, a password manager, and the double lock. You are more secure than most people online.
Password & Security Tutorials
Password Manager Tutorial
Learn how to create and safely store strong passwords on your iPhone or iPad.
Watch TutorialsFace ID & Fingerprint Setup
Set up Face ID or fingerprint recognition so you never have to type a password.
Watch TutorialsThese links open YouTube in a new tab. YouTube is safe and free to use — you can watch as many videos as you like without signing in.
📚 New to YouTube? Learn how to spot quality videos and avoid ads
No legitimate company will ever ask you for a verification code over the phone. If someone calls and asks for a code that was sent to your device, hang up immediately — it is a scam.
Remember the 3-Second Rule
Stop. Breathe. Think before you tap. If something feels urgent or too good to be true, that is your signal to pause.
If you receive a verification code you did not request, do not panic — but do change the password for that account as soon as possible. It means someone is trying to log in as you.
Practical Exercise: Strengthen Your Security
Let us put what you have learned into action. Work through these steps at your own pace — you do not need to do them all in one sitting.
- Check Face ID: Go to Settings → Face ID & Passcode and make sure Face ID is set up. If it is not, follow the walkthrough above to set it up.
- Check your Keychain: Go to Settings → Passwords and look at your saved passwords. Are any of them marked with a warning triangle? If so, those passwords may have been found in a data breach — consider changing them.
- Create a passphrase: Think of three random words and a number. Write it down on paper and store it in a safe place (like a locked drawer — never on a sticky note on your iPad).
- Change one password: Pick one account (perhaps an online shopping site — start with something that is not your bank) and change the password to your new passphrase.
- Check your fingerprint or face unlock: Go to Settings → Security (or Biometrics and Security) and make sure at least one fingerprint is registered. If not, follow the walkthrough above to set it up.
- Check your saved passwords: Open Chrome, tap the three dots, then Settings → Password Manager. Look at your saved passwords. If there is a "Password Checkup" option, tap it to see if any of your passwords have been found in a data breach — consider changing those.
- Create a passphrase: Think of three random words and a number. Write it down on paper and store it in a safe place (like a locked drawer — never on a sticky note near your device).
- Change one password: Pick one account (perhaps an online shopping site — start with something that is not your bank) and change the password to your new passphrase.
Well done! You have strengthened your device's security with biometrics and better passwords. Every step you take makes your accounts safer.
Quick Check: Test Your Knowledge
1. Which is the strongest password?
2. What does a password manager do?
3. You receive a text message with a verification code that you did not request. What should you do?
Module 3 Progress Checklist
🤝 Need In-Person Help?
Your local community offers free technology support for seniors:
Your Local Library
Many libraries offer free tech workshops and one-on-one help sessions.
Senior Centre
Community centres often host technology classes and support groups.
Connected Canadians
Free one-on-one tech support by phone or video call.
1-855-808-0505
Cyber-Seniors
Free tech training from trained volunteers.
1-844-217-3057
Congratulations! You have completed Module 3!
Your accounts are now protected by strong, unique passwords, a password manager, and biometrics. That is a fortress of security, and you built it yourself.
Feeling Stuck?
You do not have to figure this out alone. These free services are staffed by real, patient people who love helping:
Connected Canadians — 1-855-808-0505
Cyber-Seniors — 1-844-217-3057
Both services are free, Canadian, and specialise in helping older adults with technology at your own pace.
⚠️ Two Scams Every Canadian Should Know
Card Pickup Scam (Courier Fraud)
A scammer calls pretending to be your bank and says your card has been compromised. They offer to send a courier to pick it up. Your bank will NEVER send someone to collect your card. If this happens, hang up and call the number printed on the back of your card.
Call Forwarding Scam
A caller pretends to be your phone company or the government and walks you through "fixing" your phone. Without realising it, you may activate call forwarding — sending all your calls to the scammer instead. If anyone asks you to dial *72 or *21 followed by a phone number, hang up immediately. These are call forwarding codes.
Smishing (Text Message Scams)
A smishing text looks like it is from your bank, Canada Post, or the Canada Revenue Agency. It asks you to click a link or call a number to "verify your account" or "claim a package." Real banks and government agencies do not send urgent links by text. If you receive an unexpected text asking you to act right away, do not tap the link. Call the organisation directly using the number on their official website or the back of your card.
WhatsApp Account Takeover
A scammer enters your phone number on WhatsApp, which sends a 6-digit verification code to your phone as a text. The scammer then contacts you, often pretending to be a friend whose account was already stolen, and says: "I accidentally sent a code to your number — could you share it with me?" Do not share this code with anyone. WhatsApp will never ask you for a code through a message. Once a scammer has your code, they can take over your account.
Messenger "Family Emergency" Scam
A Facebook Messenger message claims to be from a grandchild, niece, or nephew in trouble — perhaps stranded in another city without their wallet. They ask for money by e-transfer or gift card. Scammers often use accounts they have already taken over to make the message look convincing. Before sending anything, phone the family member at their regular number. A real emergency call takes 30 seconds and costs nothing.
Source: Canadian Anti-Scam Coalition — standagainstscams.ca
Passwords matter at every age. DCC Kids has age-appropriate lessons on strong passwords for school and home use.
📬 Stay in the Loop
Would you like us to let you know when new lessons are added? We will never share your email, never send spam, and you can unsubscribe anytime with one click.
Quick Answers
A strong password is at least 12 characters long and mixes uppercase letters, lowercase letters, numbers, and symbols. It does not include your name, birthday, or pet name. The best passwords are passphrases — four random words together, like PurpleTulip!RainyBoat22.
Yes. Face ID (face recognition) and Touch ID (fingerprint) are among the safest ways to unlock your device. Your biometric data is stored only on your device — it never goes to Apple servers. Using them is more secure than a 4-digit PIN.
A small notebook kept in a safe place at home is acceptable. Apple Keychain password manager is also very safe and remembers passwords for you. Never save passwords in an email, a text, or a document on your phone.
Change a password immediately if you suspect it has been stolen or if a company announces a data breach. Otherwise, using a strong unique password matters more than changing it frequently.